Aug 272009
 

Problem: You’re using Visual Studio to write a Browser Helper Object for Internet
Explorer and you want to add some images to the web page being displayed.

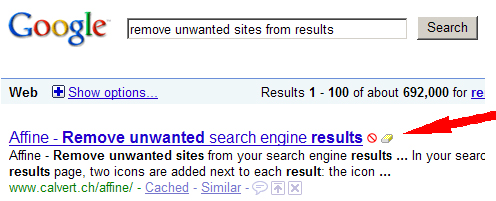
Here is an example, taken from my Affine addin. The two images I insert are shown by the arrow:

Affine in action

Finding out how to do this is trickier than expected, so here’s the recipe:

  1. Import the images into the project and create a .RC file which identifies them:

    affinehide.bmp bitmap "affinehide.bmp"
    affinefade.bmp bitmap "affinefade.bmp"

    I called this file images.rc in the images directory in my project.

  2. You’ll need RC.EXE, the resource compiler, which is in the Windows SDK. The
    2008 version for .NET 3.5 is here
  3. In your setup project’s, set the prebuild event to

    "D:Affinerc.exe" /r "d:affineimagesimages.rc"

    I copied RC.exe into my project directory because I sometimes work on a 64-bit box, where Program Files becomes Program Files (X86). Adjust the paths to suit your installation.

  4. Open your project’s .VBPROJ file and insert the three red lines shown:

    <?xml version=”1.0″ encoding="utf-8"?>
    <Project DefaultTargets="Build"
    xmlns="http://schemas.microsoft.com/developer/msbuild/2003"
    ToolsVersion="3.5">
    <PropertyGroup>
    <Win32Resource>imagesimages.res</Win32Resource>
    </PropertyGroup>

    <PropertyGroup>
    <Configuration Condition=" '$(Configuration)' == '' ">Debug</Configuration>

    Thanks to Wouter van Vugt for this!

  5. The HTML to insert the images is straightforward:

    <img src="res://affine.dll/#2/affinehide.bmp"

    where #2 means that the embedded object is an image
    Assuming this string is stored in the variable "buttonhtml" then the code to insert the button on the page is

    a.insertAdjacentHTML(&#34afterEnd&#34, buttonhtml)

  6. Now for the events. You need an event handler for the DHTML event itself:

    Imports mshtml
    Public Delegate Sub DHTMLEvent(ByVal e As IHTMLEventObj)
    _
    Public Class DHTMLEventHandler
    Public Handler As DHTMLEvent
    Private Document As mshtml.IHTMLDocument
    Public Sub New(ByVal doc As mshtml.IHTMLDocument)
    Me.Document = doc
    End Sub
    _
    Public Sub [Call]()
    Handler(CType(Document.parentWindow.event, mshtml.IHTMLEventObj))
    End Sub
    End Class

    Thanks to Rick Strahl

  7. A handler which the above will call, to actually deal with the event:

    Imports mshtml
    Module BrowserEventHandler_
    Public Sub BrowserEventHandler(ByVal e As mshtml.IHTMLEventObj)
    Try
    If e.type = "click"” AndAlso e.srcElement.tagName = "IMG" Then

  8. and finally tghe code to add in in your DocumentComplete event:

    Dim Handler As DHTMLEventHandler = New DHTMLEventHandler(doc)
    Handler.Handler = AddressOf BrowserEventHandler
    doc.onclick = Handler

Happy coding!

Jul 012009
 

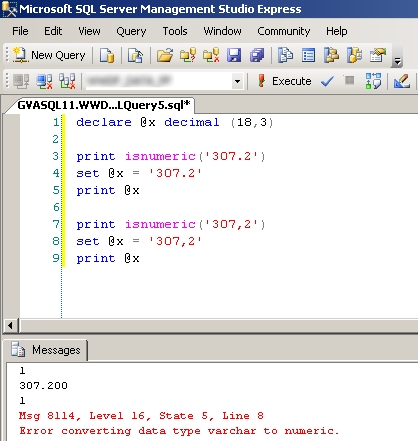
From an early age I have practised defensive programming. On a recent project, I was loading data entered on an intranet site to an SQL Server table. Wary, I used SQL’s ISNUMERIC function to validate the numbers users had entered. It worked fine for a few weeks, until somone entered a comma as a decimal separator. It turns out that ISNUMERIC accepts this, whereas casting doesn’t. Here’s the proof:

isnumeric

Doubtless, MS will try and wriggle out by saying that it depends on how your international settings are made. My contention is that if ISNUMERIC says it is then you should be able to CAST it to a number.

Period. 

(sorry for the weak pun)

 Posted by at 11:56 am  Tagged with:
Feb 242009
 

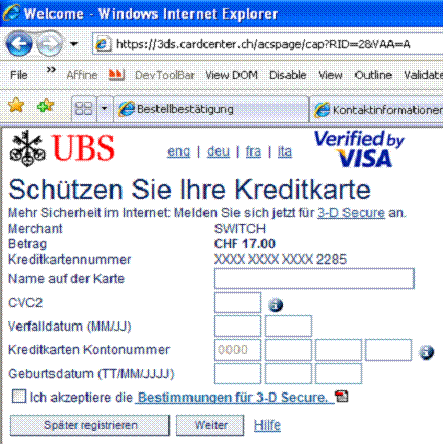
I elected to pay my dues to SWITCH.CH by credit card and got redirected to this:

ubs3dsecure

Now I have a credit card from UBS, I’m paying SWITCH and I end up at CARCENTER.CH on what looks like a teenage-hacker effort?

Believe it or not, this is indeed UBS’s implementation of 3D-Secure, which as you can read in that Wikipedia article, seems to be less than perfect. Amusingly, returning to the same URL I get this:

ubs21

which pretty well says it all. With all the other snafus the bank has been accumulating, one wonders how long it can go on…

Feb 182009
 

A recurrent problem occurs when you’ve spent hours/days/months rigging and skinning a biped and discover that your initial scale or size was wrong, either because you need to merge the biped into an existing scene with a different scale or you need to change your system units. I spent an inordinate amount of time trying to resolve this and found this solution:

In this example, I’m converting a model that’s 130 centimetres high with system units in inches to 130 centimetres in system units in centimetres – in other words making the model 2.54 times bigger, but it should work for any other type of scaling.

Input A scene X containing a skinned, weighted mesh on a biped. The biped is called BIP, the mesh is called BODY with a skin modifier.

Desired output A scene Y containing the same biped, with the mesh, bones and weights correctly scaled to a different size and/or units.

Prepare to convert

  1. Open X. Select the biped. Motion->Biped->Figure mode. Save File button to create BIP.FIG
  2. Select BODY. Select Skin modifier->Envelope. Open Advanced Parameters. Click save and create BIP.ENV
  3. Select BODY. Delete all modifiers (symmetry, skin etc). Save the scene as X1.MAX

You now have X1.MAX which contains the base mesh without modifiers, a FIG file with the biped definition and an ENV file with the envelope weights.

Create the new scene

  1. Reset
  2. If you need to change the system units for the new scene : Customise->Units Setup->System Units and change them
  3. File->Merge X1.MAX and select BODY. If you’re prompted, choose convert units (and not “adapt to file’s scale”). Check that your scene now contains only the mesh with no modifiers.
  4. Use Tools->Measure distance in front view to confirm that the mesh is indeed 130 cm high – not the 51 cm that you might have expected when changing from inches to centimetres
  5. Create->Systems->Biped. Drag in the front viewport to create a tiny biped next to your mesh (make it knee-high to your mesh)
  6. Select the COM of the tiny BIP01 you just created. Motion->Figure mode. Click load file and select the BIP.FIG you created above. The biped should centre to your mesh but it’ll be 2.54 times smaller, standing between your biped’s ankles. Check in top view.
  7. With BIP01 still selected, open motion->Structure and note the BIP’s height (just under ankle attach). Multiply this value by 2.54 and replace the height with this new value. This seems to be the trick to scaling a biped correctly. BIP01 should now match the size of the mesh closely. Make BIP01 see-through (object properties) and orbit in perspective to check that the bones and mesh are correctly aligned.
  8. If your mesh was only one half, select BODY and add symmetry (and any other pre-skin modifiers).
  9. Add a Skin modifier onto BODY.
  10. Select BODY->Skin->Envelope. Open Advanced and load BIP.ENV.
  11. Save scene as Y.

You should now have a new mesh and biped, correctly scaled. You’ll need to check and maybe fix by hand:

  • Vertex weights. Select each bone and look carefully for misplaced red vertices. Similarly, exercise the bones (not in figure mode) to isolate vertices that should be red but no longer are. The most efficient way to do this is to move the bone and select skin->envelope to adjust the buggered vertices by opening the toolbox and copy/pasting the weight of an adjacent vertex.
  • Polygons. Depending on the scaling you migh see some narrow holes in the mesh, visible as pairs of parallel edges which have “moved apart”. Fix by welding with a low threshold.
  • Bones. I have experienced an unexpectedly shortened neck making the head a little low; go into figure mode and scale as needed, this doesn’t usually mess up the vertex weights.
  • Saved postures and poses. Don’t seem to translate so well for me, often making the biped look like a fatal trauma case. I found it quicker to redo them from scratch.

Good luck!

 Posted by at 9:24 pm  Tagged with:
Dec 172008
 

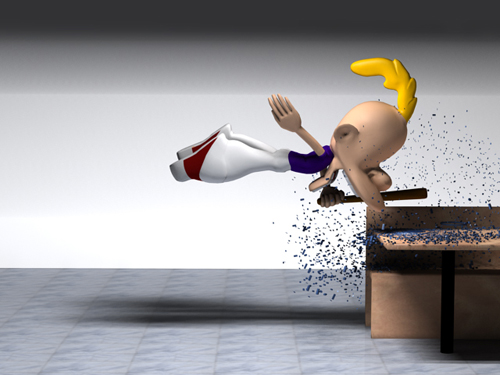
Set myself the task of learning how to make a cartoon. Lacking artistic skills, I decided to use a local character, Zep‘s Titeuf as a model. I bought a figurine at the local toy shop and used photos of it to build the mesh. Skinning the legs was the hardest part, they’re so short and fat that the creasing has to be adjusted a pixel at a time.

The first results are encouraging:

Video:

 Posted by at 11:20 am  Tagged with:
Oct 242008
 

I fell quite by accident on http://www.wordle.net, a program to layout words written by Jonathan Feinberg at IBM. The results it produces are breath-takingly beautiful, I’m at a loss for words (pun intended).

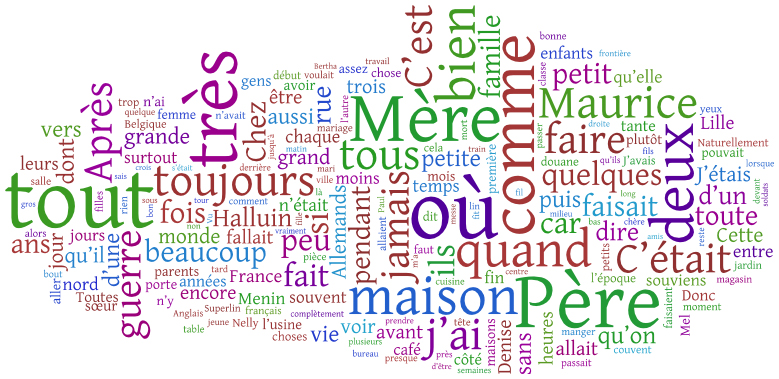
I dropped my mother’s autobiography (56’000 words) into Wordl:

The major words of the text spring out immediately, quite astonishing.

 Posted by at 3:11 pm  Tagged with:
Oct 232008
 

These past few months I’ve been doing a lot of research and with time I was getting more and more annoyed by subscription-only sites (experts-exchange) and catalogs of abstracts (citeseer), they provide me with nothing and clutter up my Google results.

To solve this problem I used Add-in Express for Internet Explorer to build an add-in for Internet Explorer, which would allow me to hide irrelevant sites. Just for the fun, I extended it to handle all the major search engines, trickier than I initially expected but all good clean fun.

In the spirit of the Internet, I’ve published it, you can pick up a copy here.

P.S. The products and the service at add-in-express.com are amongst the best I’ve seen in a long time, highly recommended.

Oct 162008
 

Many traffic-light solutions for Excel exist but all the ones I tried only work for a single light, and I needed an array like this:

I wanted to create a light by simply typing a formula in the light’s cell, with the colour of the light determined by a value in cell elsewhere. The light must change colour as soon as the underlying value changes. This wasn’t as simple to implement as I thought, but in the end a bit of VBA led to this formula :
=trafficlight(Sheet2!B4,Sheet2!B$3,Sheet2!C$3)
and the rest of the lights are created by dragging this formula right and down.

The parameters to the TrafficLight function are:

  1. The cell containing the value which determines the colour of the light.
  2. The threshold to change from red to amber.
  3. The threshold to change from amber to green.

in this example, the Sheet2 looks like this:

Project 1 has a value of 64 and thus is amber.

Here’s a ZIP file with the .XLS and the images project-progress-dashboard, feel free to use it as you see fit.

Notes:

  1. The red and green images have an exclamation mark and a tick superimposed so that they are recognisable on a black-and-white printout.
  2. You must keep the 3 GIF files in the same directory as the spreadsheet.
  3. There is one bug. If you resize a cell containing a light such that the light is no longer contained within the cell’s boundaries, the light will not be deleted when its underlying value changes (you end up with an orphaned light). To fix this, there is a “Remove lights” button; clicking it will delete all images and pressing F9 will re-generate correctly.